We aims to provide in house support to our colleagues and the Engineers for any sort of technical help.You can raise your technical queriesor browse for any solutions for the probelms through our groups.We provide driver support,OS support and utility support too to make your life a better one.

Our Mission

Transform HCL Infosystems LTD into services and solution centric organization

Tuesday, October 19, 2010

“Bluebirds” installer on LG GH22NS50 DVD-RW


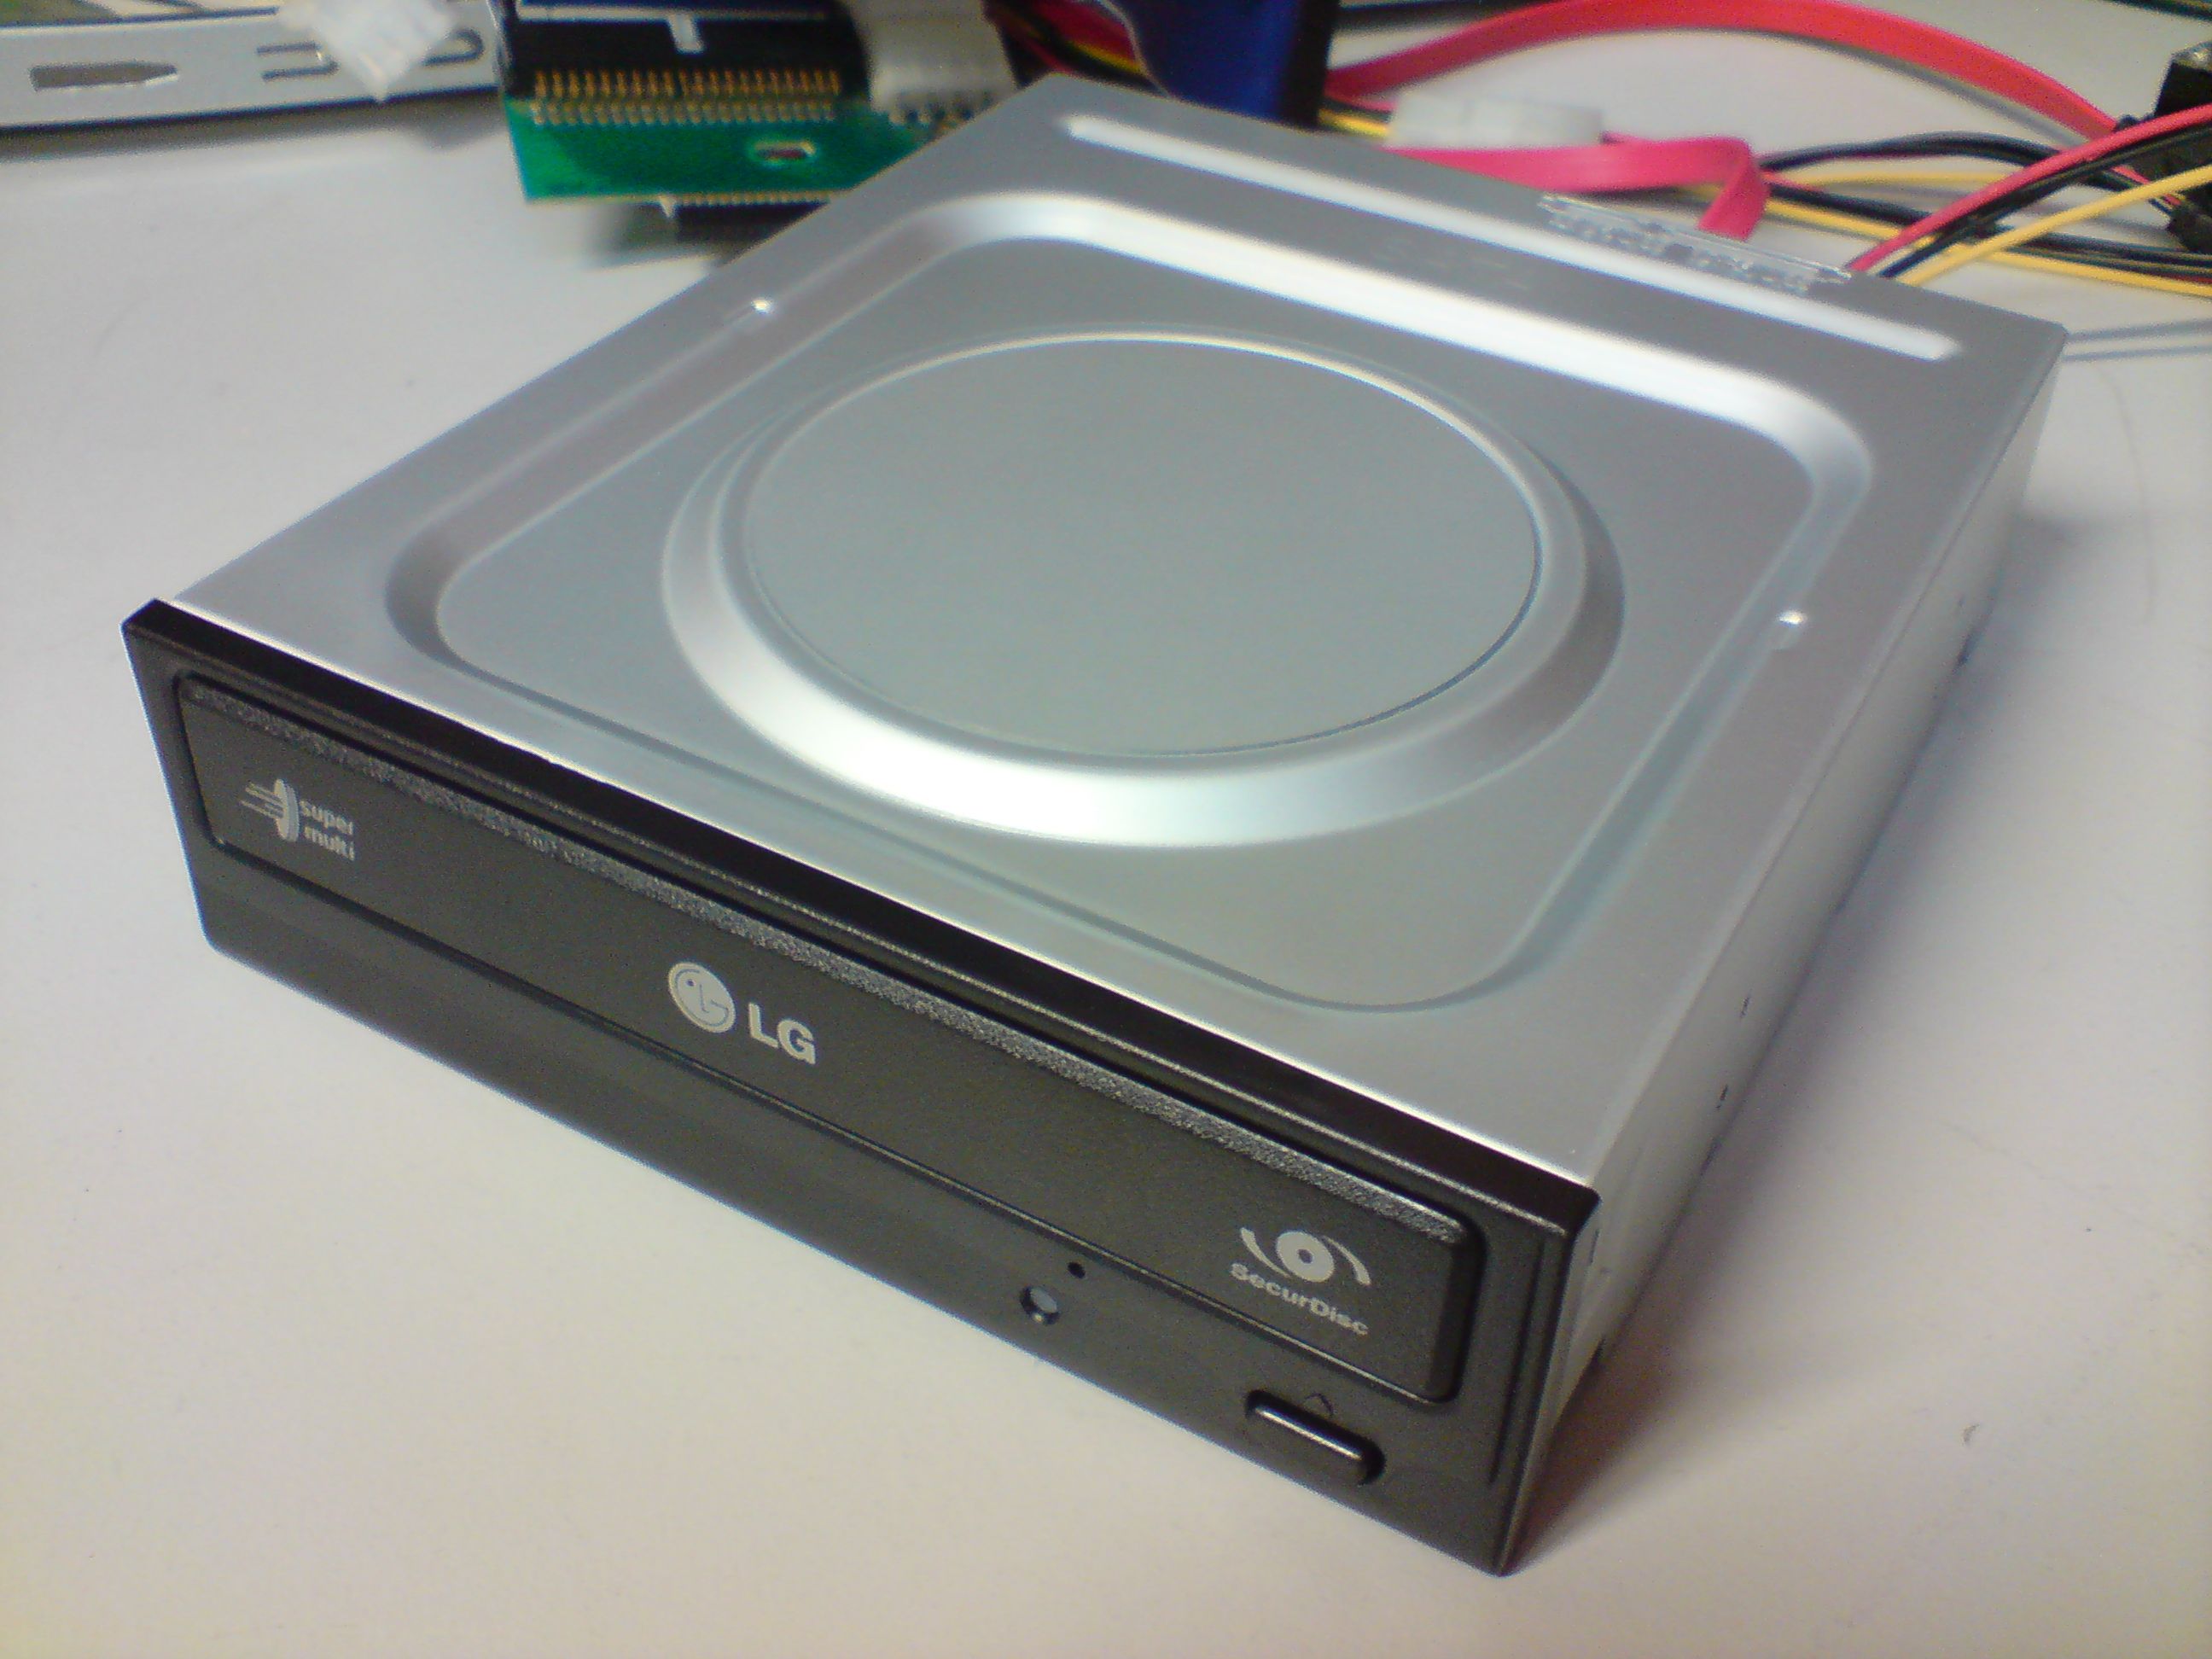
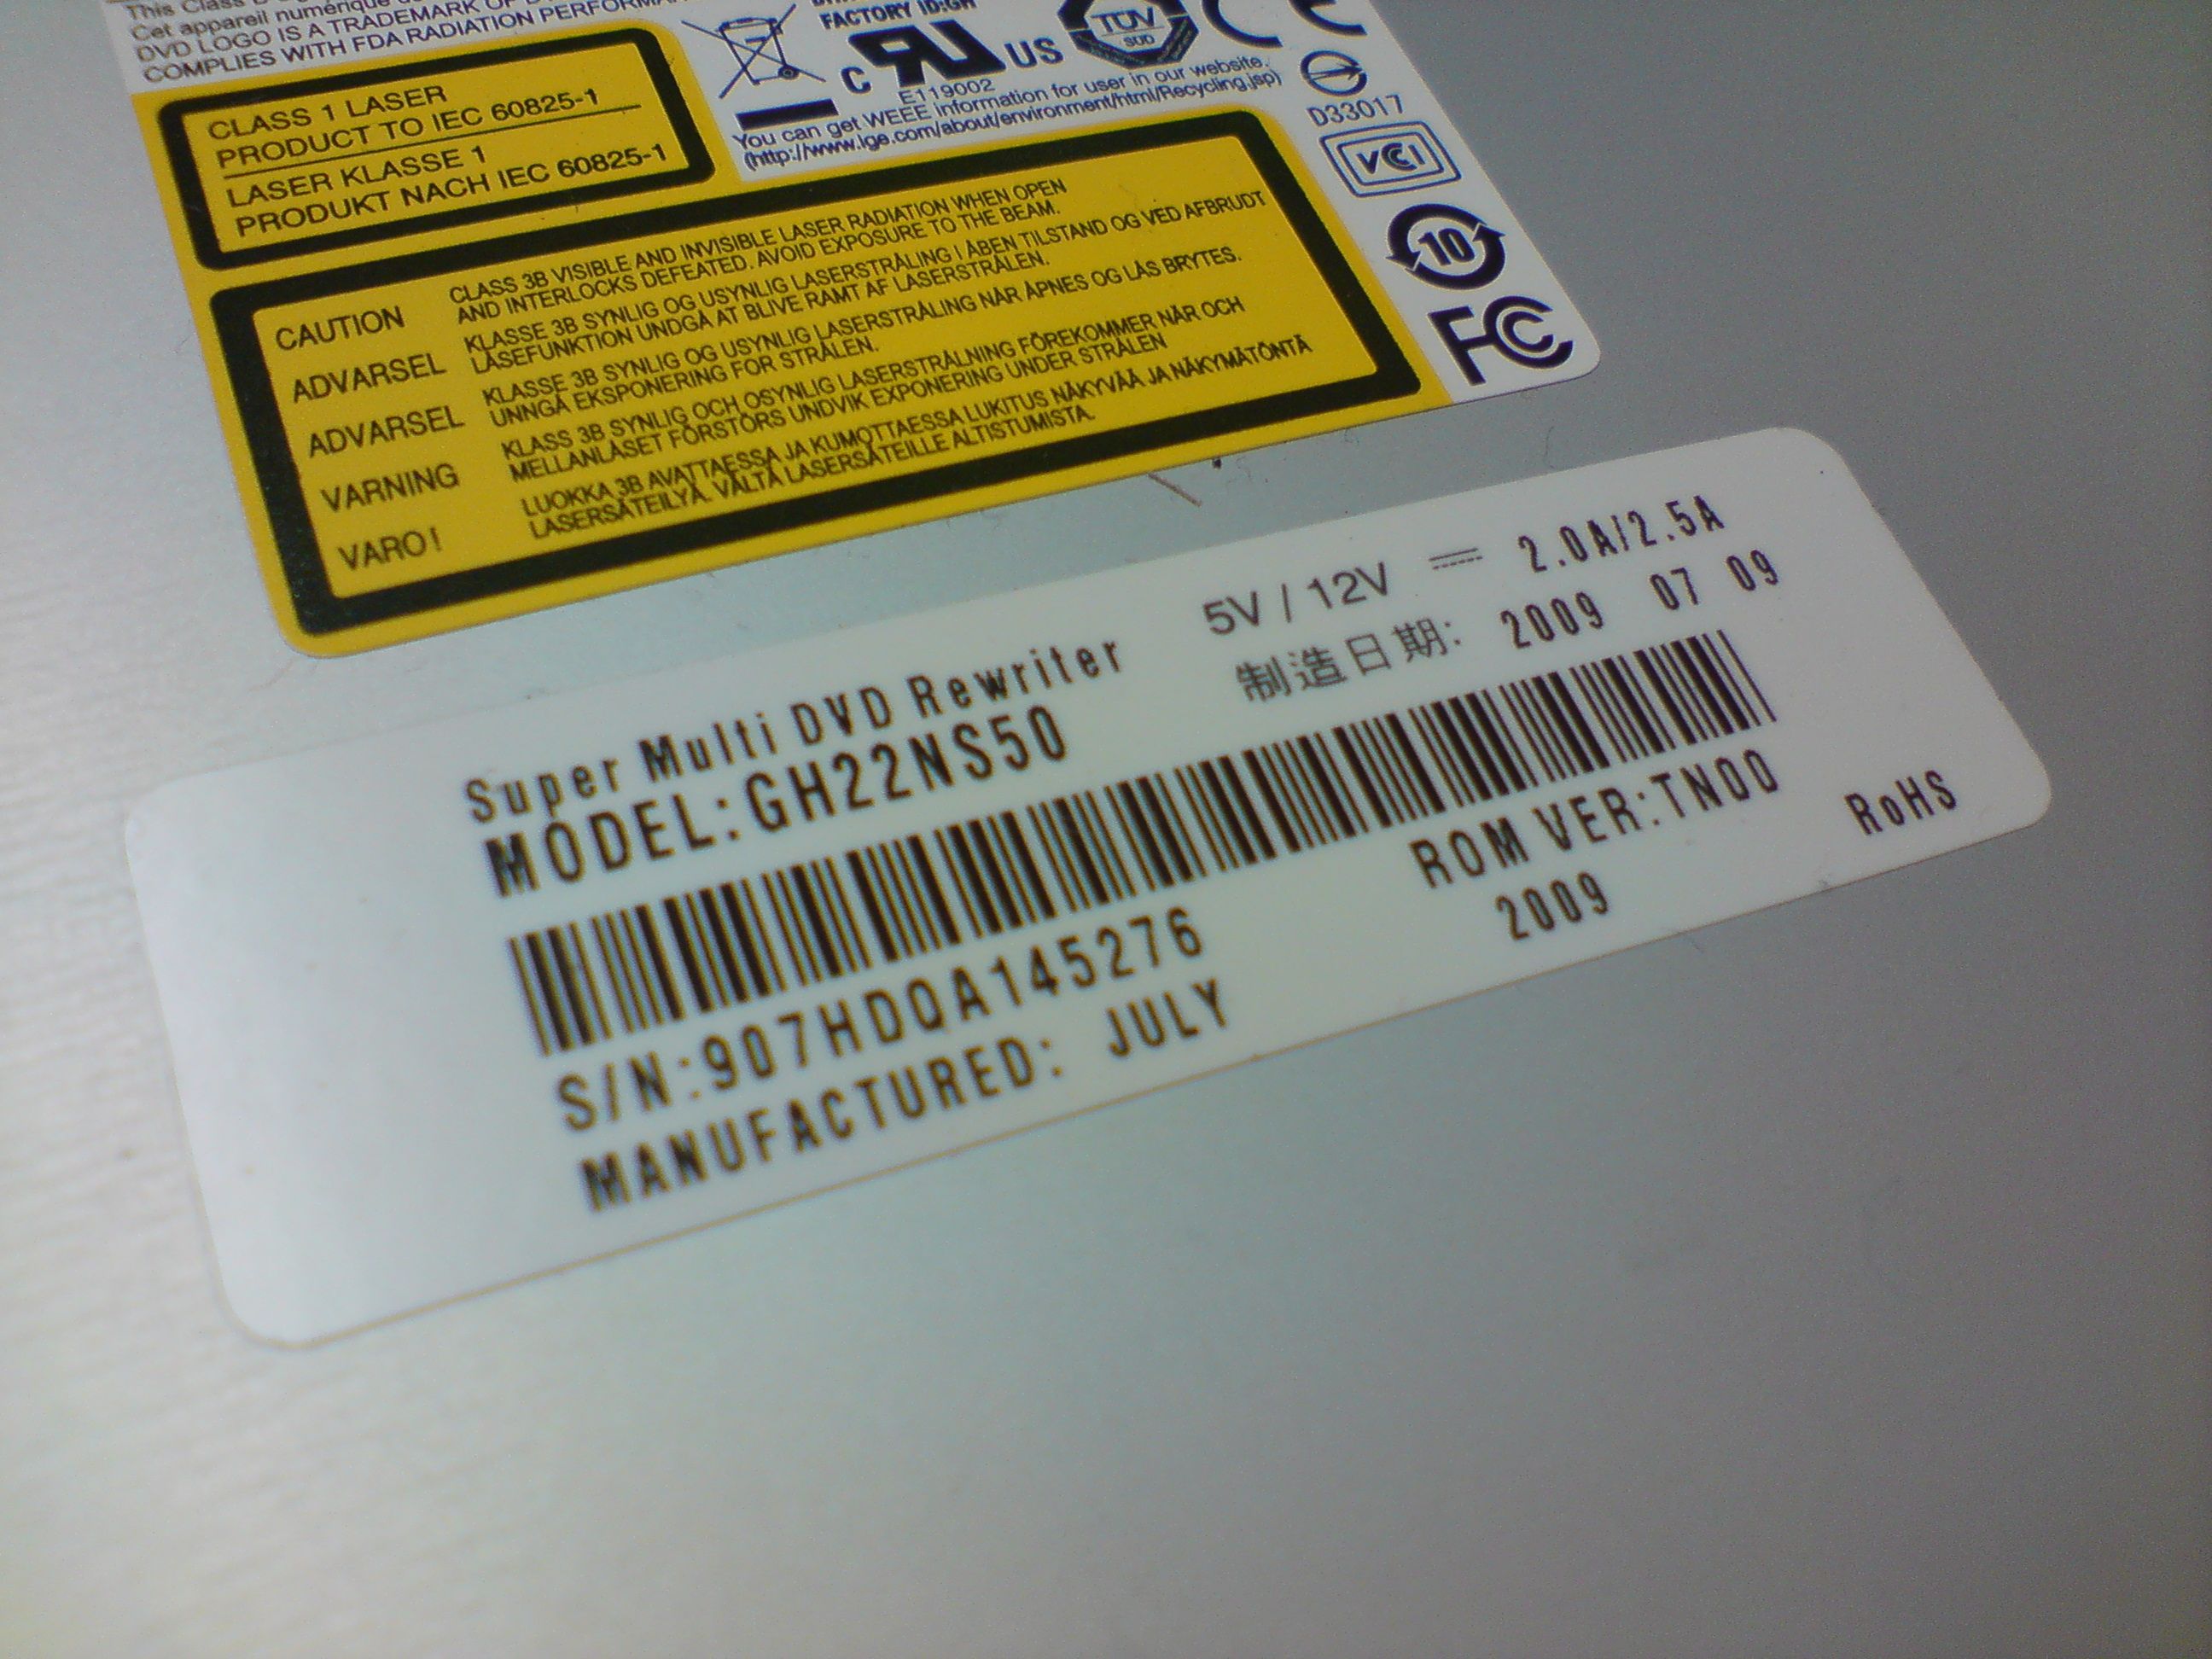
LG GH22NS50 DVD-RW. LG GH22NS50 sticker.
This is the LG GH22NS50. We’ve started stocking these at work – just the next low-cost SATA burner option for us. Except it comes with a nasty surprise, and that surprise is Bluebirds.
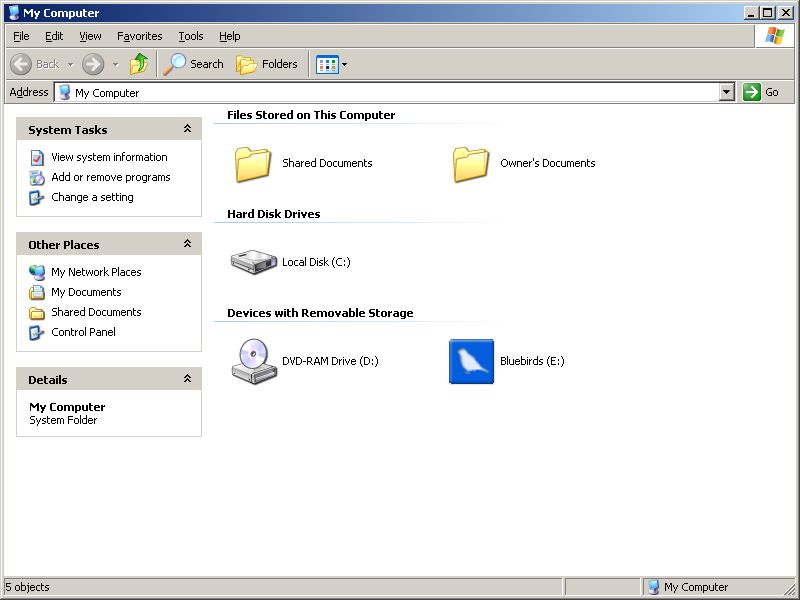
Bluebirds 'disc' shown in My Computer.
It’s some kind of drag-to-disc software included with the drive. Not on a CD, of course; it’s hacked into the drive’s firmware, and shows up when there’s no disc in the drive at all. Which means that every time you close the tray with nothing in it, you get prompted to install it, thanks to Windows helpfully autorunning it.
It’s not really a malicious program. It just sits in your system tray until you close it or uninstall it (Control Panel -> Add/remove programs, in XP). It’s probably even helpful, for the few people who let it sit around long enough to find out. I haven’t seen anyone do that yet.
Way to go, LG; not only does your drive automatically try to install an unwanted program on your customers’ computers, but you’ve changed a fundamental thing about how CD drives work: If there’s no disc in the drive, it should be empty and that’s the end of it. You’ve changed how it behaves, and that fills us with false and misleading knowledge.
It’s as bad as when ISPs used to rebrand Internet Explorer as being “provided by [some telco]“; none of my customers could ever understand that IE was just a program on their computer and nothing to do with their ISP.
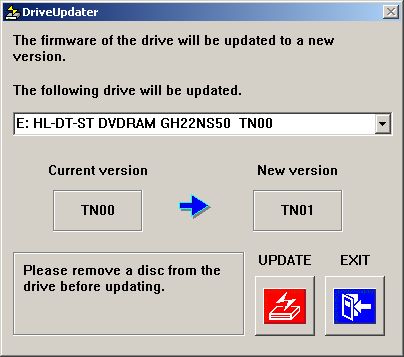
Anyway, the fellow who started this forum thread has the solution – there’s a firmware update for the drive that removes the Bluebirds installer, along with the fake disc-in-drive thing. Not to steal his thunder or anything, but I wanted to complain too. :)
Firmware update for LG burner.
The firmware updater orders you to remove the disc from the drive before running the firmware update, which is the most passive-aggressive thing I’ve ever seen a PC program do. You have to eject the drive and let it sit there poking its tongue out for 30 seconds while you erase the Bluebirds part of its brain.
I’ve uploaded the program to my /static/ folder, so there’s another place on the internet for it to be found:
You might want to read that forum thread anyway. The utter lack of official information from LG about this is disturbing.
Obviously this just removes the installer and auto-runner from the drive; if you’ve clicked yes to install it, you’ll have to uninstall it from your computer as well. I don’t recall seeing it in Control Panel; there’s a link in the Bluebirds folder in your Start Menu to get rid of it.
Update 30/9/09: There’s a separate version for the Lightscribe-enabled GH22LS50; that can be found here:
LN01 firmware update for LG GH22LS50 (Lightscribe) DVD-RW: http://tim.id.au/static/GH22LS50_TL01.exe (2MB)
Update 7/1/10: A few commenters here run Linux or BSD or something else that isn’t Windows; I don’t currently have a practical way to experiment with it myself, but one commenter successfully reflashed his drive using Crossover Linux. They offer a fully-functional 30 day trial here, and I recommend trying that if you possibly can.
If you seriously have no way of flashing it yourself though, any little PC shop ought to be able to do it for you for a small fee – if you visit the place you originally bought it from they may do it for free if you complain logically enough. At my work we pre-emptively reflash the drives before they go out because we couldn’t stand the thought of selling them with the Bluebirds crap still in them.
Update 23/5/10: A commenter has informed me of the new 02 version of the firmware for both of these drives. It took me a good 30 minutes to track down both of them, thanks to every region-localised website LG operates containing the full product page of each and every product they’ve ever made, but the respective support pages only showing the products most relevant to that region. I still have no idea where the Lightscribe version of this drive is meant to have been sold, but it’s sure not any country I’ve heard of.
Anyway – well-deserved plug here for Firmware HQ. If only companies would properly support their own products, we wouldn’t be so utterly reliant on the goodwill of sites like that. The Lx02 firmware apparently adds support for Windows 7, although I don’t recall having problems with it at work…
LN02 firmware for GH22NS50: http://tim.id.au/static/GH22NS50_TN02.exe (2MB)
LS02 firmware for GH22LS50 (Lightscribe): http://tim.id.au/static/GH22LS50_TL02.exe (2MB)

Tuesday, October 5, 2010

Uninstall Internet Explorer 8 using Perfect Uninstaller utility


If you don’t like Internet Explorer 8 for some reason after installing it and want to revert back to IE7 (or IE6), you can use Perfect Uninstaller to uninstall Internet Explorer 8 (IE8) in Vista/XP. Since many users have the same demand, we have added Internet Explorere 8 into our special uninstall list which will help you easily remove IE8 with just a few clicks.
How to uninstall Internet Explorer 8 with Special Uninstall
Step 1: Download and install Perfect Uninstaller.
Step 2: Boot your PC in safe mode and run Perfect Uninstaller. If you don’t know how to get into safe mode, click here.
Step 3: Click Special Uninstall to open the application list as below.
Special Uninstall
Step 4: Click Internet Explorer 8.0 and click Next.

Step 5: Follow a few onscreen instructions to complete the next two or three steps.
Step 6: Restarting your computer is required to complete removal.

Tuesday, September 14, 2010

You are prompted to save the changes to the Normal.dot or Normal.dotm or Normal.dotm global template every time that you quit Word

When you quit Word, you may be prompted to always save the changes to your global template, Normal.dot. or Normal.dotm First, you can turn off the prompt and Word will automatically save the changes, but you may still have a problem. Second, your Normal.dot or Normal.dotm template may be infected with a macro virus. To resolve this problem, you would need to install or update your virus protection software on your computer. Third, you could have an add-in that is causing this problem. To resolve this problem, you may need to determine what add-in is causing the problem and remove it from the Office or Word startup folders.
Every time that you quit Word, you receive the following message:
Changes have been made that affect the global template, Normal.dot. Do you want to save those changes?

Cause 1: The "Prompt to save Normal template" check box is selected

You receive this message if the Prompt to save Normal template check box is selected.

Workaround

To turn off this message, follow these steps.

Important If you turn off this message in Word, you may still have a problem. Word will automatically save the changes to your global template, Normal.dot or Normal.dotm, but you will not be prompted. You may still have to perform the other steps listed in this article.

If you use Microsoft Office Word 2003 or an earlier version of Word:
  1. On the Tools menu, click Options.

    Collapse this imageExpand this image
    Microsoft Word
    Click to expand this image

  2. On the Save tab, click to clear the Prompt to save Normal template check box.

    Collapse this imageExpand this image
    Options dialog box
If you use Microsoft Office Word 2007:
  1. In the upper-left corner of the screen, click the Office button.
  2. In the lower-right area of the drop-down box, click Word Options.
  3. In the Word Options page, click Advanced in the left menu.
  4. Use the scroll bar to scroll down to the Save section.
  5. In the Save section, click to clear the Prompt before saving Normal template check box.

Cause 2: An installed add-in or an installed macro is changing the global template Normal.dot or Normal.dotm

You may receive the message that is listed in the "Symptoms" section if an add-in or a macro on your computer modified the Normal.dot or Normal.dotm template. Add-ins that are known to cause this behavior include the following:
  • Stamps.com Internet postage
  • Works Suite add-in for Microsoft Word
An add-in installed in Word may add one or more of the following items to your computer:
  • WLL file
  • Templates
  • COM add-in
  • Auto macros

Workaround

How to remove WLL add-ins and templates in the Word and Office Startup folders

When you start Word, Word automatically loads templates and add-ins that are located in the Startup folders. Problems in Word may be the result of conflicts or of problems with an add-in. To determine whether an item in a Startup folder is causing the problem, temporarily empty the folder.

Word loads items from the Office Startup folder and the Word Startup folder. To remove items from the Startup folders, follow these steps:
  1. Quit all instances of Word. If you use Word as your e-mail editor, make sure that you quit Outlook also.
  2. On your Windows desktop, double-click My Computer, and then locate your Office Startup folder. The default location is:
    C:\Program Files\Microsoft Office\Office\Startup
    Note For Office versions 2000 and earlier, the Office folder is Office. For Office XP, the Office folder is Office10. For Office 2003, the Office folder is Office11.
  3. Drag each item from the Startup folder to the desktop. (Or create a folder on your desktop and drag each item to this new folder.)

    Note To create a new folder on the desktop, right-click a blank area on the desktop, point to New, and then click Folder.
  4. Find the Word Startup folder, and then drag each item from the Startup folder to the desktop. (Or create a folder on your desktop and drag each item to this new folder.) The default location for the Word Startup folder depends on the operating system.

    On Microsoft Windows 98 and Windows Millennium Edition without profiles enabled, the location is:
    C:\Windows\Application Data\Microsoft\Word\Startup
    On Windows 98 and Windows Millennium with profiles enabled or on Windows NT 4.0, the location is:
    C:\Windows\user name\Application Data\Microsoft\Word\Startup
    On Windows 2000, Windows XP, and Windows Server 2003, the location is:
    C:\Documents and Settings\user name\Application Data\Microsoft\Word\Startup
  5. Start Word.

    If you can no longer reproduce the problem, and you removed multiple items from the Startup folder or folders, you can try to isolate the problem by adding the files back to the appropriate Startup folder, one by one. Try to reproduce the problem after each addition to determine which file causes the problem.
How to remove COM Add-ins

COM add-ins can be installed in any location. COM add-ins are installed by programs that interact with Word. To view the list of installed COM add-ins, follow these steps:

If you use Word 2003 or an earlier version of Word:
  1. On the Tools menu, click Customize.

    Collapse this imageExpand this image
    Microsoft Word
    Click to expand this image

  2. Click the Commands tab.

    Collapse this imageExpand this image
    Customize dialog box

  3. On the Commands tab, click Tools in the Categories list.

    Collapse this imageExpand this image
    Commands tab

  4. Use the mouse to drag the COM Add-Ins command to a toolbar.

    Collapse this imageExpand this image
    COM Add-Ins command

  5. Click Close to close the Customize dialog box.

    Collapse this imageExpand this image
    Customize dialog box

  6. Click the new COM Add-Ins button to view the COM add-ins that are loaded with Word.

    Collapse this imageExpand this image
    COM Add-Ins dialog box
    Click to expand this image
If add-ins are listed in the COM Add-Ins dialog box, temporarily turn off each of the add-ins. To do this, click to clear the check box for each COM add-in that is listed, and then click OK. When you restart Word, Word starts without loading the COM add-ins that you turned off.

If the problem is resolved after you turn off the COM add-ins, one of the listed COM add-ins is the cause of the problem. If you have multiple COM add-ins listed, you may want to determine which one is causing the specific problem. To determine this, turn the COM add-ins back on one at a time, and then restart Word.

If you use Word 2007:
  1. In the upper-left corner of the screen, click the Office button.
  2. In the lower-right area of the drop-down box, click Word Options.
  3. In the Word Options page, click Add-ins in the left menu.
  4. At the bottom of the page, select COM Add-ins in the Manage: drop-down list, and then click Go.

    Note If add-ins are listed in the COM Add-Ins dialog box, temporarily turn off each add-in. To do this, click to clear the check box for each COM add-in that is listed. Then, click OK. When you restart Word, Word starts without loading the COM add-ins that you turned off.

    If the problem is resolved after you turn off the COM add-ins, one of the COM add-ins is the cause of the problem. If you have multiple COM add-ins listed, you may want to determine which one is causing the specific problem. To determine this, turn the COM add-ins back on one at a time, and then restart Word.
How to remove Word auto macros

Some macros are named "auto" macros. These auto macros run automatically when Word is started. The following table lists these auto macros. To start Microsoft Word without running the auto macros, hold the SHIFT key while you start Word. To do this, click Start, point to Programs, and then hold the SHIFT key and click Microsoft Word.
Collapse this tableExpand this table
MacroStorage locationAutomatically runs
AutoExecIn the Normal template or in a global add-inWhen you start Word
AutoNewIn a templateWhen a new document that is based on the template is created
AutoOpenIn document or templateWhen a document that is based on the template or that contains the macro is opened
AutoCloseIn document or templateWhen a document that is based on the template or that contains the macro is closed
AutoExitIn the Normal template or a global add-inWhen you quit Word
Word recognizes a macro with a name that begins with "Auto" as a macro that automatically runs when the situation to which it applies occurs. You can temporarily prevent an auto macro from running by holding SHIFT while performing the action that causes the macro to run. For example, to prevent an AutoOpen macro from running, hold SHIFT while you open a document or a template.

If the problem is resolved by holding the SHIFT key when you start Word or when you perform an action in Word such as opening a document, an auto macro is the problem. To work around this problem, follow these steps:

If you use Word 2003 or an earlier version of Word:
  1. Click Start, and then click Run.

    Collapse this imageExpand this image
    Start menu

  2. In the Open box, type winword, and then click OK.

    Collapse this imageExpand this image
    Run dialog box

  3. On the Tools menu, point to Macro, and then click Macros.

    Collapse this imageExpand this image
    Microsoft Word
    Click to expand this image

  4. In the Macros dialog box, a list of macros may appear. If any macro listed begins with "Auto," you may want to remove this macro. To remove an auto macro, click the macro, and then click Delete.

    Collapse this imageExpand this image
    Macros dialog box


    Note An auto macro may have been added by a Word add-in. To determine what template contains the auto macro, change the Macros in box to a listed template. After you determine which template contains the auto macro, you may want to remove that template from your computer. Removing a template that was added by a Word add-in may reduce or stop the add-in's functionality.
  5. Click Cancel or click Close to close the Macros dialog box.
  6. On the File menu, click Exit to quit Microsoft Word.

    Collapse this imageExpand this image
    Microsoft Word
If the problem is resolved after you restart Word, the auto macro was the problem.


If you use Word 2007:
  1. In the upper-left corner of the screen, click the Office button.
  2. In the lower-right area of the drop-down box, click Word Options.
  3. In the Word Options page, click Popular in the left menu.
  4. In the Top options for working with Word section, click to select the Show Developer tab in the Ribbon check box, and then click OK.
  5. At the top of the Word window, click the Developer tab.
  6. On the Developer tab, click Macros in the Code group.

    In the Macros dialog box, a list of macros may appear. If any macro that is listed begins with "Auto," you may want to remove this macro. To remove an auto macro, click the macro, and then click Delete.

    Note An auto macro may have been added by a Word add-in. To determine what template contains the auto macro, change the Macros in box to a listed template. After you determine which template contains the auto macro, you may want to remove that template from your computer. Removing a template that was added by a Word add-in may reduce or stop the add-in's functionality.

Tuesday, August 3, 2010

Outlook Express requires a word processing or stand alone spell checking application installed before spell checking can be enabled.
Problem area: Outlook Express Spellchecking is not functional after installing an enabling application (i.e. Office, Word, Works Suite that includes Word, etc.), try the steps below.


!!!When tweaking your system files and/or registry, always set a new restore point before making changes.

 
To follow the the steps below, you need to change the default Windows setting for  Hidden Files and Folders.
  • From the Explorer Menu bar Tools>Folder Options> View Tab or
  • by going to Start> Control Panel> Folder Options> View Tab.
  • Uncheck the boxes that hide files. Click for Example

1. Open Explorer> Go to [Drive XP is installed]:\|Program Files\Common Files\Microsoft Shared\Proof

 
2. Delete CSAPI3T1.DLL (If not found continue to next step)

 
3. Put in the Windows XP CD

 
4. Go to Start>Run

Start Run

 
5. In the Open box type msconfig and then click OK


6. Click on the "Expand File" button located in the bottom right corner of the System Configuration Utility


MSCONFIG

 
7. In the "File to Restore" box, type in CSAPI3T1.DLL

 
8. In the "Restore From" box type in there "?:\i386 \CSAPI3T1.DL_" without the quotes and substituting your cd-rom drive letter in place of the ?

 
9. In the "Save file in" box type "[Drive XP is installed]:\Program Files\Common Files\Microsoft Shared\Proof" without the quotes
   
10. Click on the Expand button
   
  If you have trouble expanding the file.

Download it from HERE


11. Go back to C:\Program File\Common Files\Microsoft Shared\Proof
   
12. Rename CSAPI3T1.DL_ to CSAPI3T1.DLL (I was told to do in lower case but everything else was in upper case-it didn't matter which way I did it still worked)

 
13. Go into Outlook Express, open Tools - Options and then go to the Spelling tab. Put a check mark in "Always check spelling before sending."

 
14. Feedback from sources that have tried the fix suggest you may need to reboot the computer to complete the fix.
 
15. Test by creating a new e-mail message sent to yourself and spel sume wirds incorrektly

Thursday, July 29, 2010

MailStore Home - The free single-user desktop solution for email archiving


MailStore Home enables you to backup all your email messages from multiple applications and accounts into one secure and persistent archive. Lightning-fast search, one-click backup, powerful export - all information from your email is at your fingertips anytime. Never lose important email again!


All information from your email, is at your fingertips whenever you need it, without fail.

MailStore Home Archives Email From:

·                                 Microsoft Outlook 2000, XP, 2003 and 2007
·                                 Microsoft Outlook 2010 BETA (32-bit version only)
·                                 Microsoft Outlook Express and Windows Mail
·                                 Microsoft Exchange Server Mailboxes
·                                 Hosted Microsoft Exchange Mailboxes
·                                 Mozilla Thunderbird and SeaMonkey
·                                 POP3 and IMAP (including webmail services such as Gmail and Yahoo)
·                                 .eml and other files
Mailstore Home does not interfere with your settings or mail configuration, meaning it can do no harm, only good.

Benefits

·                                 Archive all email messages centrally, securely and permanently
·                                 No storage limitations
·                                 Search your email in a fraction of a second (incl. attachments)
·                                 Integrated CD/DVD burning, backup archives with 1 click
·                                 Conserve disk space; MailStore Home saves only a single instance of mail and attachments
·                                 Preview saved messages directly in MailStore and reopen them in your local mail client (e.g. Microsoft Outlook)
·                                 Your email can be exported to a variety of destinations
·                                 Messages are stored MIME-compatible, and can be recovered at any time without information loss (e.g. to import them in other applications)


Help Page: http://en.help.mailstore.com/MailStore_Help

Wednesday, July 28, 2010

How to Run the System File Checker (Sfc.exe) Offline in Windows 7 and Vista

The System File Checker (sfc.exe) is an useful tool that lets you scan the integrity of Windows system files, and repair corrupt or missing system files. Numerous cases have been resolved thus far by running Sfc.exe with the "scannow" parameter. However, there are situations where in a corrupt or missing system file prevents Windows from booting normally, and running Sfc.exe from Windows isn’t possible. In such cases, Sfc.exe can be run offline using two additional parameters, via the Windows Recovery Environment (Windows RE) in Windows 7 and Windows Vista.

Booting into Windows RE

Configure the boot order in the BIOS such that the first boot device is your CD/DVD drive.
Insert the Windows 7/Vista Setup DVD and restart the computer.
Alternately, you may use the Windows 7/Vista System Repair Disc if you have one.
When prompted, press a key to boot from the DVD. In the "Install Windows" screen, click Repair your computer

Select your Windows installation, and click Next


Editor’s Note: Make a note of the drive-letter of your Windows 7 installation, as seen from Windows RE
This is the drive-letter you want to reference when running Sfc.exe offline.
Click Command Prompt


To scan the integrity (and repair) a specific file, use this command:

sfc /scanfile=d:\windows\system32\zipfldr.dll /offbootdir=d:\ /offwindir=d:\windows
 
The above command scans the file zipfldr.dll and replaces it if required.

To scan the integrity of all system files and repair them, run this command:
sfc /scannow /offbootdir=d:\  /offwindir=d:\windows
 

This process takes some time (<5 min) to complete, and there weren’t any integrity violations.

Monday, July 12, 2010

Installing Oracle9i on Red Hat Linux 7.1 - 7.2

  Overview
This article is a comprehensive guide for installing Oracle9i (9.0.1 and 9.2.0) on the Red Hat Linux 7.1 and 7.2 operating environment. Keep in mind the following assumptions:
Downloading / Unpacking Oracle9i Installation Files
Swap Space Considerations

Known Issue #1 : (Error with Oracle 9.0.1 during linking of ins_plsql.mk)
The "binutils" package that ships with Red Hat 7.1 and Red Hat 7.2 will not work with Oracle 9i. You will see this bug show up during the "link" phase at around 62% when trying to link PL/SQL (ins_plsql.mk)
You have three options to get around this bug:

Known Issue #2 : (Error with Oracle9i during the linking of ins_oemagent.mk and ins_ctx.mk)
If you have ever installed Oracle8i on Red Hat Linux, you may be aware of several environment variables that had to be set in your .profile or .bash_profile:
Make sure that you DO NOT set these environment variables in your profile (login) script when installing Oracle9i. They will cause the installer to fail during the linking of the OEM Agent (ins_oemagent.mk) and Context (ins_ctx.mk)!
Known Issue #3 : Oracle 9.2.0 Only : (ORA-01041 / ORA-03113 during connect after shutting down the database in same SQL*Plus session)
When shutting down the database using SQL*Plus, you will need to do one of the following in order to startup the database again: There seems to be a bug in SQL*Plus that does not allow you to perform a shutdown followed by a startup in the same SQL*Plus session.
If you attempt to perform a startup and shutdown in the same session, you will be confronted with an ORA-01041 and ORA-03113 error. What seems to be happening is a problem with the allocation of shared memory segments. If you mistakenly try this, you have two options to recover from it:

Below is an example of the problem and how to solve it by removing the shared memory segments created by the startup command after shutting down the database:

Install the Java Development Kit (JDK)
In order to use Oracle's HTTP [Apache] Server, you will need to download an appropiate JDK. This can include either Sun's JDK 1.3.1 or Blackdown 1.1.8_v3. In the past, Oracle has always recommended Blackdown. I prefer Sun's JDK myself and have been successful using it with 9i. As per the JDK documentation, install JDK under /usr/local.
Then create a symbolic link to the JDK under /usr/local/java.


  • Sun's JDK 1.3.1 Download from: http://java.sun.com
    Install as root:

    % cp j2sdk-1_3_1_01-linux-i386.bin /usr/local
      % chmod 755 j2sdk-1_3_1_01-linux-i386.bin
      % ./j2sdk-1_3_1_01-linux-i386.bin
      % ln -s /usr/local/jdk1.3.1_01 /usr/local/java
  • Blackdown 1.1.8_v3 Download from: http://www.blackdown.org
    Install as root:

    % cp jdk118_v3-glibc-2.1.3.tar.bz2 /usr/local
      % bzip2 -dc jdk118_v3-glibc-2.1.3.tar.bz2
      % tar xvf jdk118_v3-glibc-2.1.3.tar
      % ln -s /usr/local/jdk118_v3 /usr/local/java
Create Oracle Account and Directories
Create Oracle User Account: % groupadd -g 115 dba
% useradd -u 173 -c "Oracle Software Owner" -d /u01/app/oracle -g "dba" -m -s /bin/bash oracle
% passwd oracle

Create Oracle Directories:
% mkdir /u01
% mkdir /u01/app
% mkdir /u01/app/oracle
% mkdir /u01/app/oracle/admin
% mkdir /u01/app/oracle/admin/O901DB
% mkdir /u01/app/oracle/admin/O901DB/adhoc
% mkdir /u01/app/oracle/admin/O901DB/adump
% mkdir /u01/app/oracle/admin/O901DB/arch
% mkdir /u01/app/oracle/admin/O901DB/backups
% mkdir /u01/app/oracle/admin/O901DB/bdump
% mkdir /u01/app/oracle/admin/O901DB/cdump
% mkdir /u01/app/oracle/admin/O901DB/create
% mkdir /u01/app/oracle/admin/O901DB/dba
% mkdir /u01/app/oracle/admin/O901DB/exp
% mkdir /u01/app/oracle/admin/O901DB/logbook
% mkdir /u01/app/oracle/admin/O901DB/pfile
% mkdir /u01/app/oracle/admin/O901DB/release
% mkdir /u01/app/oracle/admin/O901DB/report
% mkdir /u01/app/oracle/admin/O901DB/tuning
% mkdir /u01/app/oracle/admin/O901DB/udump
% mkdir /u01/app/oracle/product
% chown -R oracle:dba /u01/app/oracle

% mkdir /u03
% mkdir /u03/app
% mkdir /u03/app/oradata
% mkdir /u03/app/oradata/O901DB
% chown -R oracle:dba /u03/app/oradata

% mkdir /u04
% mkdir /u04/app
% mkdir /u04/app/oradata
% mkdir /u04/app/oradata/O901DB
% chown -R oracle:dba /u04/app/oradata

% mkdir /u05
% mkdir /u05/app
% mkdir /u05/app/oradata
% mkdir /u05/app/oradata/O901DB
% chown -R oracle:dba /u05/app/oradata

% mkdir /u06
% mkdir /u06/app
% mkdir /u06/app/oradata
% mkdir /u06/app/oradata/O901DB
% chown -R oracle:dba /u06/app/oradata

% mkdir /u07
% mkdir /u07/app
% mkdir /u07/app/oradata
% mkdir /u07/app/oradata/O901DB
% chown -R oracle:dba /u07/app/oradata

% mkdir /u08
% mkdir /u08/app
% mkdir /u08/app/oradata
% mkdir /u08/app/oradata/O901DB
% chown -R oracle:dba /u08/app/oradata

% mkdir /u09
% mkdir /u09/app
% mkdir /u09/app/oradata
% mkdir /u09/app/oradata/O901DB
% chown -R oracle:dba /u09/app/oradata

% mkdir /u10
% mkdir /u10/app
% mkdir /u10/app/oradata
% mkdir /u10/app/oradata/O901DB
% chown -R oracle:dba /u10/app/oradata

% mkdir /opt/bin
% chown oracle:dba /opt/bin

Oracle Environment Variable Settings:
An example ".bash_profile" is provided in the Configuration Files / Scripts section below.
Run the Oracle Installer
As the "oracle" user account:
Configuration Files / Scripts
Example:
    .bash_profile
$HOME/.bash_profile for the "oracle" user account.
    initO901DB.ora
Sample instance parameter script for Oracle9i. Place this file in ~oracle/admin/O901DB/pfile before running the RUN_CRDB.sh script below.
    create_database901.tar
An example "create database" set of scripts. Untar the file to ~oracle/admin/O901DB/create. If you decide to change the name of the ORACLE_SID, here are the files that need to be changed:
  • crdb.sh
  • create_database.sql
  • postDBCreation.sql
The main script to run is: RUN_CRDB.sh.